

São 4 baterias e 6V cadada Marca Trojan, usada,s estavam ao serviço num carrinho de golf que estava a uso por uma empresa de segurança, comprei as 4 por apenas 100 € (uma pechincha), no entanto tive a sorte do meu cunhado já ter descoberto em Mafra um Sr. que vende baterias de vários tipos, fomos lá, estive cerca de 10 minutos à conversa como Sr. Joaquim Nunes (919 186 127) que revelou ser uma pessoa sincera e entusiasmado também ele por conceitos de aproveitamento de energia (com a vantagem de ter conhecimentos técnicos), lá me aconselhou a trazer estas baterias, que, segundo ele, ainda tem muito para dar, são baterias de descarga profunda, requerem manutenção ou seja tem que se ter atenção ao nível da água (destilada) é o único cuidado que me preveniu tirando isso é usar e abusar, vamos ver como se revelam a longo prazo, por agora tem mantido sempre a carga com que vieram, mas também ainda não as usei, os dados delas quando novas são os seguintes:

ainda não decidi se irei colocá-las a funcionar a 24V ou a 12V tudo depende do que o vento for capaz de produzir em termos de Amperes. Depois fui ao Chagas e comprei o cabo de solda de acordo com o que precisava (na verdade exagerei na espessura, mas assim fico com margem para inventar)
vejamos a tabela de capacidade de condução dos cabos:

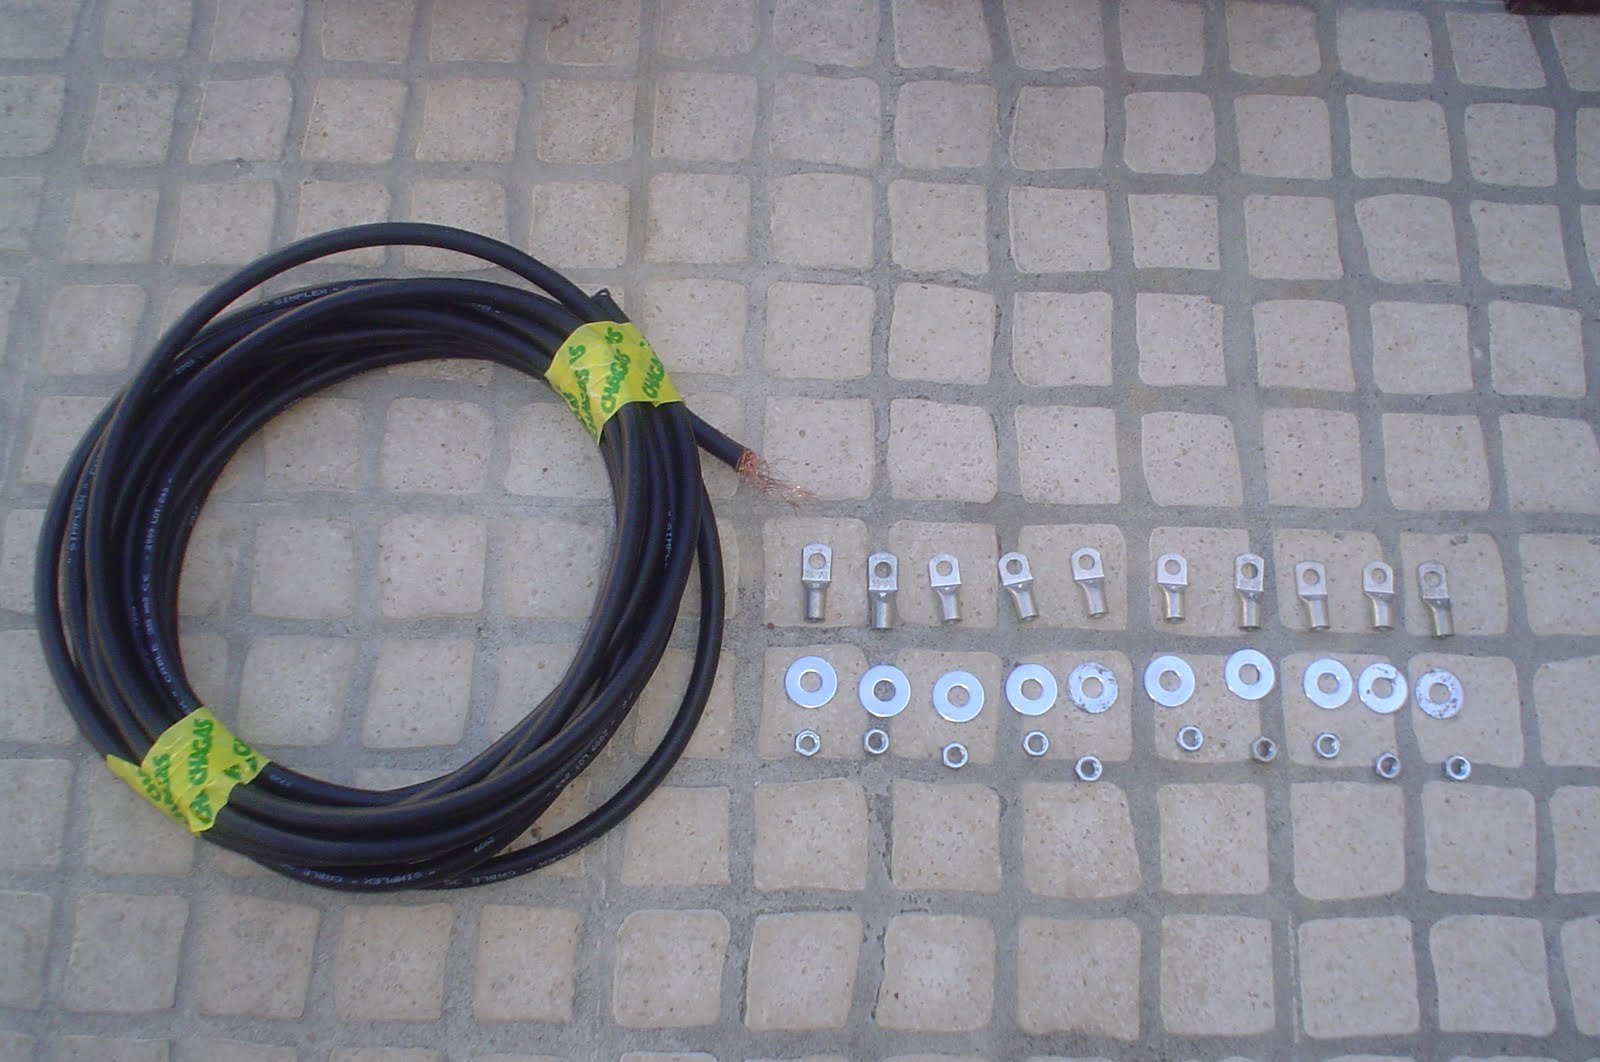
o Cabo que comprei foi o de 35mm porque mesmo que as baterias debitem 200 Amp posso ter cabo até 15 metros de distância sem problemas, no entanto não irei ter uma distância tão grande porque vou colocar as baterias a cerca de 3 metros do aerogerador e o controlador de carga e inversor logo a seguir a cerca de 1 metro (ficará tudo no sótão, farei depois a puxada e distribuição de corrente a partir dai), resultado 10 metros de cabo de soldadura de 35mm - 59,04 €, +10 terminais de cabo de soldadura - 5,76 € + 10 anilhas e 10 porcas - 1,45€ = 66,25 €
Estou à espera que chegue dos USA o controlador de corrente e a resistência, aqui ficam as fotos os que optei e respectivas características:

440 Amp! 10,000 watt!! - Diversion (Charge) Regulator
With Two High contrast Meters (both Volts and Amps)
Two D/C breakers/disconnects.
Fully wired, ready to go for both wind and solar.
Works directly with 12, 24 and 48 volt systems
Use this controller to regulate and prevent battery overcharge in:
Solar Systems
Wind Systems
Hydro Systems
Some of the key features of this controller are:
Microprocessor controlled -- This is very important for both stability and functionality.
User changeable settings -- Several controllers on the market set the dump level, and that's that!
Super High amp rating - 440 Amps -- 10,000 watts. -- Uses the same relay as the SEA-440.
Works directly with 12, 24 or 48 volt systems. -- The relay contacts can handle open collector voltages of up to 120 volts.
High Contrast LED battery voltage. - Several controllers do not tell you what's going on - This one does!
High Contrast LED turbine amperage meter.
Meters can be shut using the on/off switch.
Two factory installed, fully wired D/C breakers and disconnects.
Entire unit is wired and ready to go for both wind and solar.
Battery status LED
Push to test. -- Ever wonder if your controller & load are working OK?
Large (8" x 12") solid steel enclosure, with multiple conduit knockouts
Large enough terminal blocks that you can actually terminate large wire (See notes below.)
The electronics are fully isolated from the enclosure, no ground loops.
Draws almost no energy while monitoring (all electronics must use some power, to work -- this is a miser)
Reverse Polarity protected.
Some specifics about the points made above.
The microprocessor is the heart of the controller. It is given the battery voltage and the user changeable trip points. This information is analyzed and acted upon.
The Battery level is checked, and based on that info, the Green LED flashes or is illuminated as follows
(One) Flash indicates the battery is less than 12 volts (12 volt system - Double for 24 etc)
(Two) Flashes indicates the battery is 12 to 12.5V
(Three) Flashes indicates the battery is 12.6 to 13v
(Four) Flashes indicate the battery is 13.1 to 13.5V
( Five) Flashes indicates the battery is above 13.5V but less than 13.9V (Settings are adjustable)
Steady green means the battery is full.
The red LED is illuminated when the battery is being dumped at 14.5v (or the charge source diverted.)
The dump remains active for a minimum of 5 seconds, at which time it is checked by the microprocessor. If battery voltage drops below the "Dump Cancel " level, the dump is disabled, otherwise the dump is continued and rechecked every 5 seconds.
When you click the "TEST" push-button - the 5 second cycle is started (one time, unless the batteries are within the "Dump Start" and "Dump Cancel" zone.)
Settings are user changeable! By simply turning a simple potentiometer with a small screwdriver, you
can quickly adjust the trip point.
High amp rating -- 440 Amps! -- 10,000 watts!! -- This is a MONSTER controller.
This controller is capable of handling the input from 166, 60 watt solar panels, or 10, 1000 watt wind turbines, or any combination of the two not to exceed 440 amps, 10,000 watts. This is a lot of control.
About load diversion.
Several schools of thought on the subject.
The source of power (wind turbine, solar panels etc.) -- should remain connected to the batteries while the dump is active.
The source should be diverted to the load directly and disconnected from the batteries.
We happen to believe that is far better to leave the wind turbine connected to the batteries at all times. Why? When you remove the battery level voltage from a wind turbine and send its power directly to a load, then it sees for all practical purposes a short circuit (depending on the resistance of the load and lead wires.) This may cause the turbine blades to slow dramatically and in some cases bring it to a halt. This braking action can cause heat build up in the stator if it is repeated every few seconds or so (if the battery is just a little over the top). When you allow the turbine to see the batteries, along with the load, the turbine remains more within its design realm -- always a good thing.
The internal relay is configured to dump the batteries along with the source, but if you desire to disconnect the source from the batteries and send it to the load directly, simply utilize the N/C contacts of the relay as well. We'll be happy to send you a diagram -- this is a very simple to accomplish.
Agora visto por dentro:

A resistência:

Especificações da mesma:
THESE 2 USA MADE INDUSTRIAL RESISTORS ARE MOUNTED ON A STEEL PLATE AND ARE USED AS A DIVERT LOAD FOR WIND TURBINES.A DIVERT LOAD KEEPS YOUR WIND TURBINE FROM FREE WHEELING WHEN YOUR BATTERYS ARE FULL.FREE WHEELING IN HIGH WIND CAN CAUSE DAMAGE TO YOUR WIND TURBINE.
RATED AT 40 AMPS FOR 12 VOLT BATTERY BANKS
RATED AT 20 AMPS FOR 24 VOLT BATTERY BANKS
DON'T TRUST GREEN RESISTORS MADE IN CHINA THEY CAN FAIL!!
THE INDUSTRIAL DUTY DIVERT LOAD IS MANUFACTURED IN MISSOURI(THAT'S USA NOT CHINA)
CONNECTS EASILY TO OUR MW440 AMP / 10,000 WATT CHARGE CONTROLLER
E o esquema de ligação disto e de outras possíveis conexões:

Peço desculpa por colocar tudo em Inglês, mas assim foi só copiar da página deles e colar aqui, logo que tenha disponibilidade traduzirei para português
Como podem verificar o sistema é todo exagerado (mesmo à USA), mas como já disse assim fico com margem para futuras invenções porque com um controlador que aguenta 440 Amps ou 10000 Watts acho que não terei problemas de resistência do material ou terei ???

4 comentários:
Outra informação a acompanhar...
Só uma dúvida: usaste energia eólica em vez de fotovolteica por alguma razão especial? Pelo que li, e dependendo dos locais, pode até ser mais rentável... Mais que noa seja porque podemos ter vent 24/7 enquanto que sol já é diferente...
Já tenho um sistema fotovoltaico que está a produzir para a EDP, no entanto perante os custos de um sistema fotovoltaico que debitasse 800 Watts e considerando como disseste e bem que o aerogerador pode trabalhar sempre (noite e dia desde que tenha vento) optei pelo aerogerador.
No entanto o meu cunhado investiu num painel de 90 Watts e baterias (2 x 50 amp) e gastou 600 €, só quando eu tiver o meu sistema a trabalhar em pleno é que poderei comparar melhor mas acho que à partida o meu sistema irá ter melhores prestações, de referir que o investimento que o meu cunhado fez deve-se ao facto de necessitar de abastecer de corrente a autocaravana que tem daí também um dos motivos que o levou a optar pelo sistema fotovoltaico que é mais rentável no verão, mas de inverno não e como referi na minha zona Praia de Santa Cruz há quase sempre vento Verão e Inverno. Razão pela qual existem tantos parques eólicos aqui perto
Olá, acabei de instalar um aerogerador (Bombarral), com alternador PMA de compra (windynation) e o resto feito pr mim (pás em fibra de vidro + chassis em aço + controlador electrónico). Necessitava do contacto do Sr. das baterias (Mafra), pois o nº que postou só tem 8 algarismos! Podia postar o nº de novo sff? Obrigado.
Peço desculpa pela falha já corrigi o número em cima.
Cumprimentos
João Gomes
Enviar um comentário